Cosmetic Product Photography That Converts for Brands
Unlock the power of cosmetic product photography that converts! Learn essential tips to boost sales with stunning visuals and effective techniques.
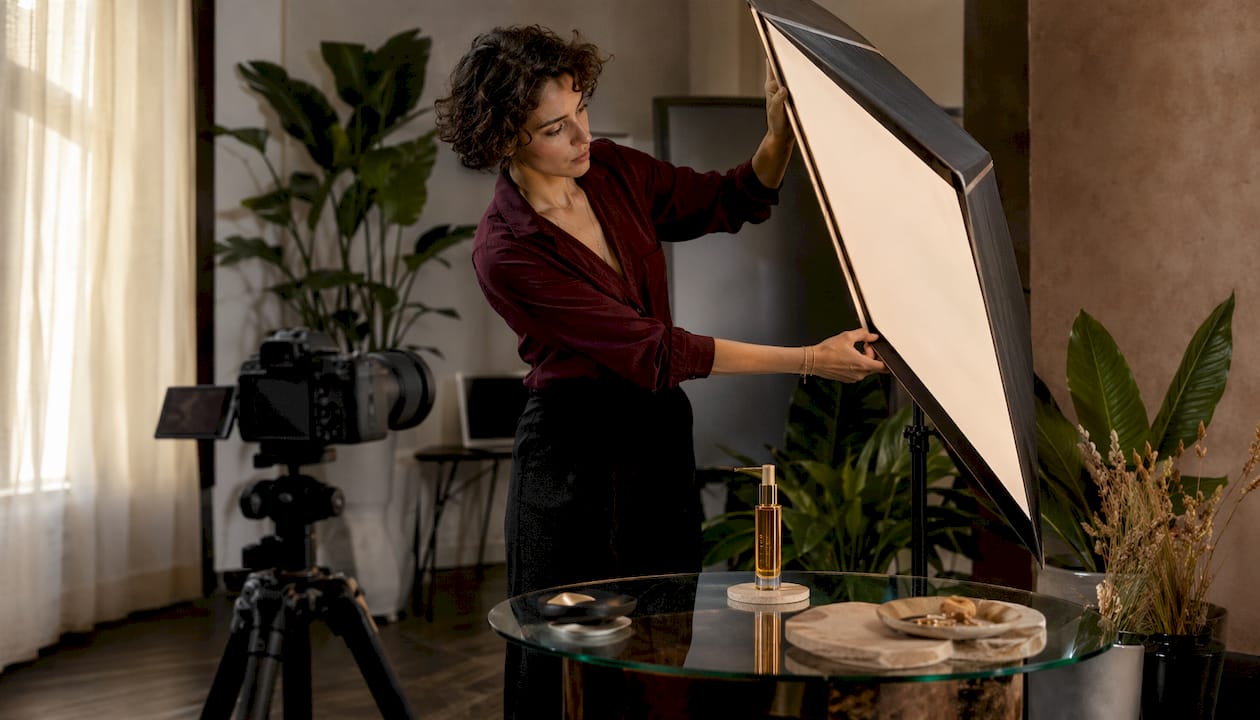
You can get high-converting cosmetic product photography with a modest studio kit or a tight pro brief. Image quality shapes buying decisions for 60% of beauty shoppers, and professional cosmetic imagery can increase conversions by up to 45%. The gap between a product that sells and one that sits is often a single bad photo.
Start here:
- Clean every product with a microfiber cloth and air can, then wear jewelry-grade gloves before touching anything on set
- Decide your shot types before you shoot: white-background hero, texture macro, and one lifestyle image cover most platform needs
- Set a custom white balance using a gray card at the start of every lighting setup
- Embed an sRGB color profile in every export file
- Match your file specs to the platform: Amazon requires a minimum 1,000 px on the longest side with a pure white background (RGB 255, 255, 255)
Quick DIY action: Place an X-Rite ColorChecker Passport or a simple gray card in your first frame. That single step anchors your entire batch correction in Lightroom or Capture One and eliminates color drift across SKUs.
Quick hiring action: Before signing any quote, ask the photographer for a sample retouched image with an embedded ICC profile and proof they use a color-checker workflow. Studios like Kenitpatel that handle marketplace-ready exports will have this as standard.
Table of Contents
- What types of cosmetic product photography do you actually need?
- What gear do you need for a professional setup?
- How do you control reflections and show texture in lighting?
- How do you prepare cosmetics before the shoot?
- What composition and styling rules actually move the needle?
- How do you keep color accurate from shoot to export?
- What does a smart post-production workflow look like?
- What are the image specs for major marketplaces?
- When should you DIY, and what does a pro shoot cost in the US?
- Reusable shot list you can take to any shoot
- Common mistakes that cost brands money and how to fix them
- Legal and branding considerations you cannot skip
- Key Takeaways
- The part most guides get wrong about beauty photography
- What Kenitpatel delivers when you are ready to hire a studio
- Useful sources for further reading
What types of cosmetic product photography do you actually need?
The shot type you choose should follow the business goal, not personal preference. Mixing them up wastes budget and creates a catalog that looks inconsistent.
White-background pack shots are non-negotiable for marketplace listings. Amazon, Walmart Marketplace, and most major retailers require a pure white background for the hero image. This shot shows the product clearly, communicates size, and passes compliance checks. It is the baseline, not the finish line.
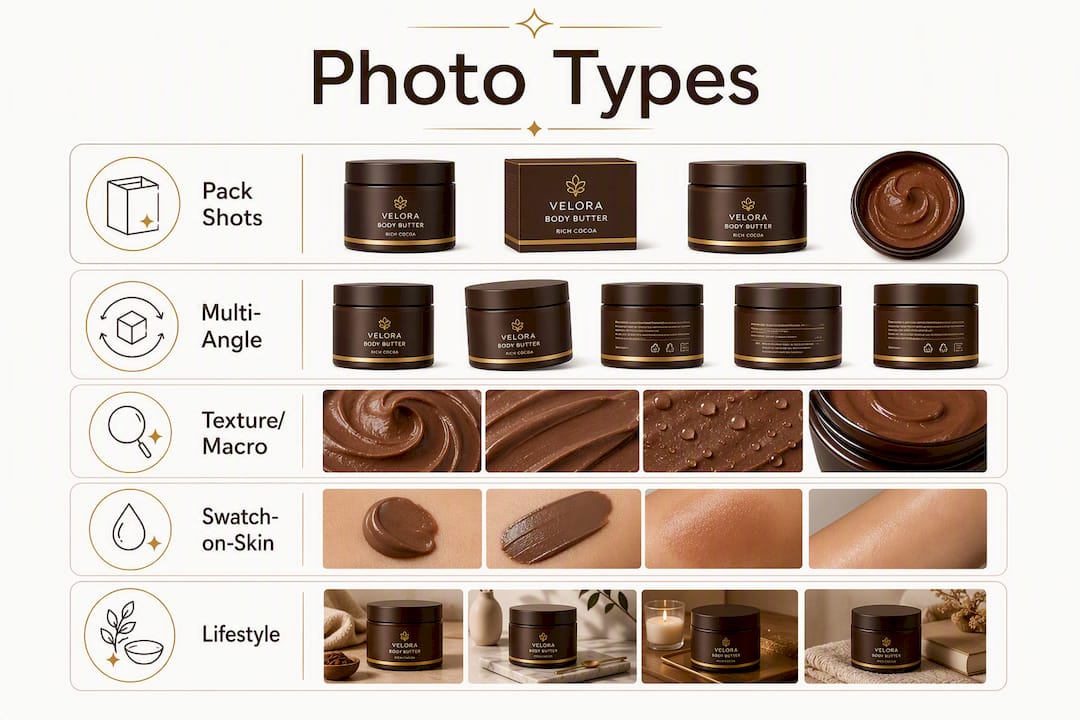
Multi-angle e-commerce sets expand on the pack shot by showing the product from the front, side, back, and at a three-quarter angle. For a serum bottle, that means the label, the dropper detail, and the cap. Guides recommend multiple images per SKU for e-commerce listings, and multi-angle sets fill most of that count efficiently.
Texture and macro shots are where beauty photography earns its keep. A close-up of a cream being scooped, a serum droplet mid-fall, or a pigment swatch smeared across skin tells a shopper what no ingredient list can. Industry data shows a clear shift toward texture-forward imagery for trust and conversion, with professional photos raising conversions by up to 45%, particularly on product detail pages and paid social carousels.
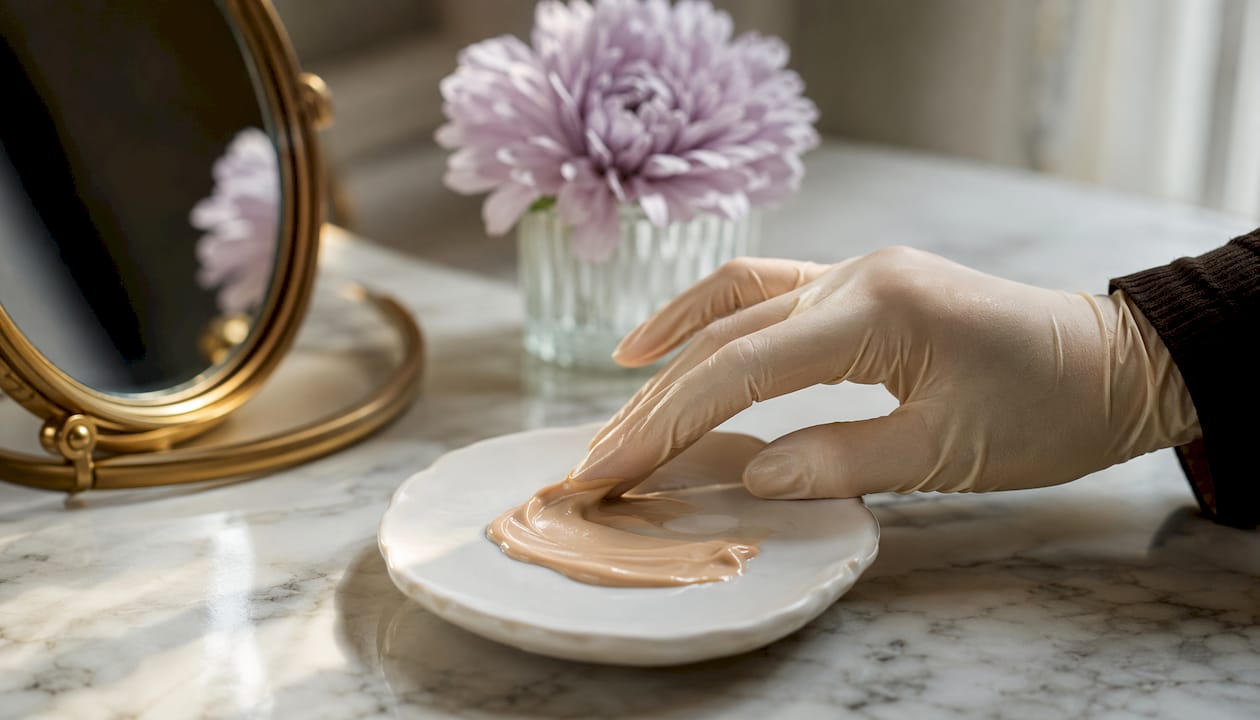
Swatch-on-skin images matter most for color cosmetics: lipstick, eyeshadow, blush, and foundation. They answer the question every shopper has before buying a shade they cannot test in person.
Lifestyle and editorial images show the product in use or in context. These work best for Instagram hero posts, brand storytelling, and the secondary images on a product detail page. They are not required for marketplace compliance, but they close the gap between a browser and a buyer.
| Shot type | Primary use case | Platform fit |
|---|---|---|
| White-background hero | Marketplace compliance | Amazon, Walmart, Flipkart |
| Multi-angle set | Full product detail | PDP, catalog |
| Texture/macro | Ingredient and texture proof | PDP, paid social |
| Swatch-on-skin | Shade accuracy | PDP, Instagram |
| Lifestyle/editorial | Brand storytelling | Instagram, brand site |
What gear do you need for a professional setup?
The camera body matters less than the lens. A 90–105mm macro lens on a mid-range mirrorless body will outperform a flagship camera paired with a kit lens for cosmetic close-ups every time. Lens choice is where the image quality actually lives.
Starter tier (under $1,500 total)
- Mirrorless body (Sony a6000 series or Canon EOS M50 Mark II)
- 90mm or 100mm macro lens (Canon EF 100mm f/2.8L or Tamron 90mm f/2.8)
- 50-inch collapsible softbox with a speedlight
- Collapsible white sweep background
- 18% gray card and a basic ColorChecker
- Microfiber cloths, air blower, and jewelry-grade gloves
- Tripod with a ball head and a remote shutter release
Pro-entry tier ($1,500–$5,000)
- Full-frame mirrorless (Sony a7 series, Nikon Z6 II)
- Dedicated macro lens plus a 50mm for wider lifestyle shots
- Two monolight strobes with softboxes and a reflector kit
- Tethering cable and Capture One for live review
- X-Rite ColorChecker Passport Photo 2
- Plinths, risers, and clamps for product elevation
- Spare batteries and a dedicated shooting table
Studio tier ($5,000+)
- Medium-format digital back or high-resolution full-frame body
- Macro rail for precise focus stacking
- Profoto or Broncolor strobes with large octaboxes and strip lights
- Calibrated monitor (NEC or Eizo) with a Datacolor Spyder or X-Rite i1Display colorimeter
- Helicon Focus license for focus stacking
- Full tethering workflow with live color preview
Pro Tip: Rent before you buy. A half-day rental of a macro lens and a monolight kit from a local camera rental house costs far less than buying gear you use twice a year. Renting also lets you test whether a 90mm or 105mm focal length suits your shooting distance before committing.
Session checklist:
- Camera body + charged batteries + memory cards
- Macro lens + lens cloth
- Tripod + remote shutter or tethering cable
- Two light sources + modifiers (softbox, reflector, flag)
- Gray card + ColorChecker
- Microfiber cloths + air blower + gloves
- Backgrounds + plinths
- Products (cleaned, labeled by SKU)
How do you control reflections and show texture in lighting?
The core rule: match light quality to finish. Matte packaging wants soft, even light. Glossy and metallic surfaces need controlled specular highlights, not flat illumination. Glass fragrance bottles are their own category entirely.
Glossy and metallic packaging
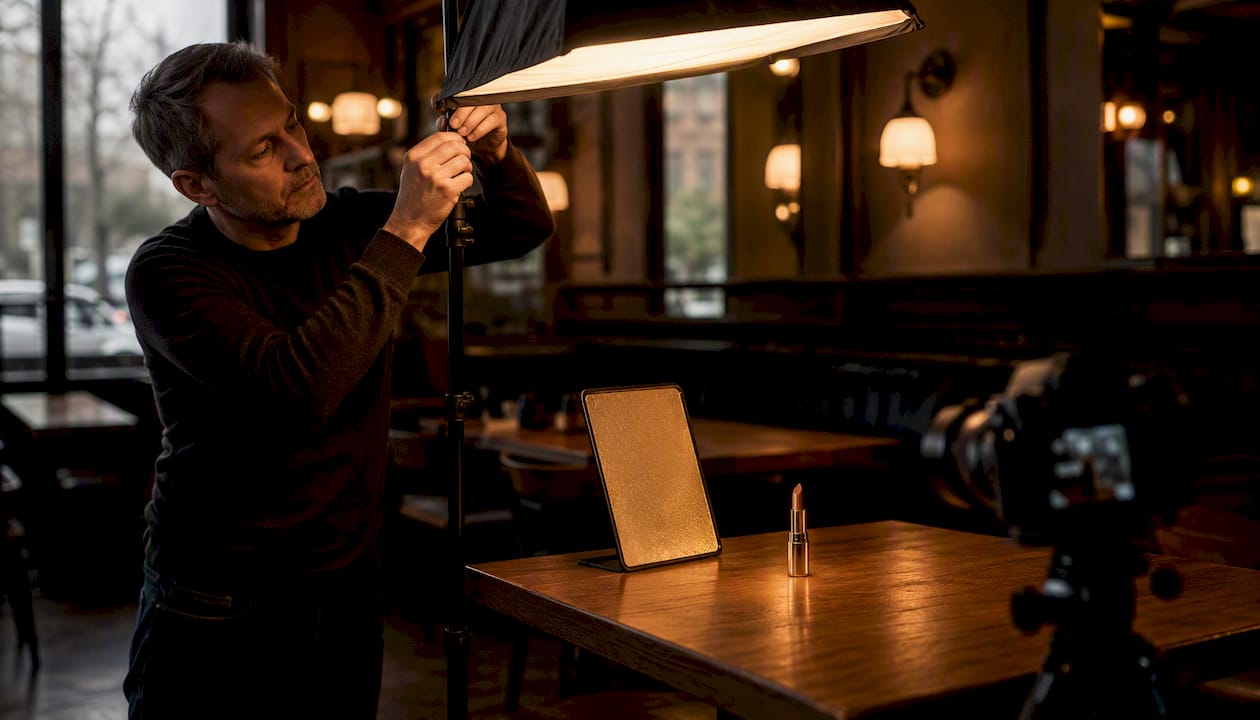
Place a large softbox at roughly 45 degrees to the product and add a rim light from behind to separate the product from the background. The rim light creates a thin highlight along the edge that reads as premium. Use a black flag on the opposite side to deepen shadows and add contrast. Without the flag, the image looks flat.
Translucent serums and glass perfume bottles
Backlit or sidelit setups reveal the liquid color and the bottle's internal geometry. Place a light panel behind a white diffusion scrim behind the bottle, then add a small reflector card in front to fill the shadow side. For fragrance product photography, this approach shows the liquid's depth without blowing out the glass.
Cream and texture shots
Directional, slightly harder light from a 45-degree angle rakes across the surface and makes texture visible. A large softbox placed too close and too frontal will flatten a cream's peaks and valleys into a smooth, uninteresting surface. Move the light further to the side and watch the texture come alive.
- Set your main light at 45 degrees to the product
- Add a reflector card on the opposite side to control shadow depth
- Place a black flag between the reflector and the product to kill unwanted bounce
- Use a scrim or diffusion panel to soften any remaining hotspots
- For metallic caps: add a small strip light behind the product aimed at the cap only
Pro Tip: A 4×6-inch black foam card costs almost nothing and does more for contrast control than adding a third light. Move it in and out while reviewing the tethered image live. The difference is immediate.
Troubleshooting quick-reference:
- Fingerprint reflections visible: re-clean with microfiber, check gloves, reshoot before retouching
- Blown highlights on metal caps: reduce strip light power by one stop or move it further back
- Washed-out cream texture: move main light 15–20 degrees further to the side
How do you prepare cosmetics before the shoot?
Product prep is where most small brands lose money. A fingerprint that takes 30 seconds to wipe off on set takes 10 minutes to clone out in Photoshop. Studio leads consistently point to meticulous cleaning as the single biggest time-saver in post-production.
- Unpack and inspect every SKU the day before the shoot. Check for dents, label misalignment, and residue from stickers.
- Remove price stickers and adhesive residue with a cotton swab and isopropyl alcohol, then let the surface dry fully.
- Clean with a microfiber cloth in one direction, then follow with a short burst from an air blower to remove dust.
- Put on jewelry-grade gloves before touching any product and keep them on for the entire session.
- Place products on plinths or risers so you can handle them without touching the photographed surfaces.
- Swatch workflow: use a consistent surface (a ceramic tile or a neutral-toned skin-tone card), the same applicator for every shade, and label each swatch with the SKU and the lighting set ID. Photograph the swatch alongside a gray card in the same frame.
- Liquids and creams: work over a silicone mat or a shallow tray to contain spills. Use pipettes for precise placement of serums or oils. For layered textures, prep the arrangement off-frame and transfer it carefully.
Pro Tip: Assign one person on set as the handler. Their only job is to keep products clean and ready off-frame. The photographer never touches a product directly. This one change cuts fingerprint retouching time by more than half on a multi-SKU shoot day.
What composition and styling rules actually move the needle?
Composition in cosmetic photography is not about being artistic. It is about making the product readable at thumbnail size and consistent across a catalog of 50 SKUs.
Keep the product as the undisputed hero. Props exist to reinforce context, not to compete for attention. A moisturizer sitting next to a sprig of rosemary and a stone reads as "natural." The same moisturizer surrounded by five props, two candles, and a draped fabric reads as "cluttered." Limit props to three or fewer, and make sure every prop earns its place by reinforcing the brand promise.
Shot priority order for listings vs. ads:
- Hero white-background: always first; required for marketplace compliance
- Angled label shot: shows the product name and key claims at a readable angle
- Texture/macro: the trust-builder; goes in position three or four on a PDP
- Cap and packaging detail: communicates quality and finish
- Lifestyle/context image: last in the listing sequence, first in a paid social ad
Camera angle matters more than most brands realize. Shooting slightly below the product's midpoint and angling up creates a subtle sense of elevation and luxury. Shooting from directly above (flat lay) works for palettes and multi-product arrangements but makes tall bottles look short and squat.
For thumbnail readability, check every image at 200–400 px wide before finalizing. If the product name is not legible and the shade is not identifiable at that size, the crop or the label angle needs to change. Leave breathing room on all four sides for marketplace crop tools that auto-trim to a square.
How do you keep color accurate from shoot to export?
Color accuracy is the single most important factor for brand trust in beauty e-commerce. A foundation that photographs two shades darker than the physical product generates returns and negative reviews. Managing color fidelity is not optional for cosmetic brands.
- Shoot RAW, always. JPEG bakes in white balance decisions you cannot fully undo later.
- Place a ColorChecker Passport in the first frame of every lighting setup. This is your ground truth for batch correction.
- Set a custom white balance using a gray card before each setup change. Do not rely on Auto White Balance across a multi-SKU session.
- Calibrate your monitor monthly using an X-Rite i1Display or Datacolor Spyder colorimeter. An uncalibrated monitor means you are editing blind.
- Build a base profile from the ColorChecker frame in Lightroom or Capture One, then sync that profile across every image from the same lighting setup.
- Export with an embedded sRGB profile for all web and marketplace deliverables. Use Adobe RGB only when the destination is print.
Pro Tip: Keep one photographed physical swatch per major shade and use it for final visual verification before export. Hold the printed swatch next to your calibrated monitor. If they match, you are done. If they do not, the problem is in your export settings or your monitor calibration, not the image itself.
What does a smart post-production workflow look like?
Post-production is where a good image becomes a high-converting one. The goal is not perfection at any cost; it is consistent, accurate, platform-ready images delivered fast.
Step-by-step workflow:
- Ingest and tether review: import RAW files, flag rejects, and identify the ColorChecker frame for each setup
- Base develop: apply the ColorChecker-derived profile; sync white balance and exposure across the session
- Spot repair: use clone and heal tools for dust, fingerprints, and surface blemishes
- Frequency separation: separate texture from color/tone for cream and powder shots; retouch tone without destroying surface detail
- Focus stacking (macro shots): merge multiple focus planes in Helicon Focus or Photoshop to achieve full sharpness on small products
- Export presets: web sRGB JPEG at 72–150 KB with embedded profile; high-res 2,000–3,000 px master TIFF or PSD for archives; platform-specific sizes per marketplace requirements
Batching tips:
- Use Capture One session presets to sync white balance and exposure across SKUs shot under the same lighting
- Photoshop action scripts handle repetitive tasks: background removal, canvas resizing, watermark placement
- AI background removal tools (such as Remove.bg or Photoroom's API) dramatically reduce manual masking time for catalog-scale production, but always verify color fidelity and edge quality manually
Retouching boundaries: retain natural product texture. Over-smoothing a cream makes it look artificial. Keep ingredient labels and shade names fully legible. Never shift a product color to make it look more appealing; match the physical product.
What are the image specs for major marketplaces?
Platform compliance is not negotiable. A non-compliant hero image gets suppressed, and a suppressed listing does not sell.
| Platform | Min. image size | Background | Color profile | Max file size |
|---|---|---|---|---|
| Amazon | 1,000 px on the longest side | Pure white (RGB 255,255,255) | sRGB | 10 MB |
| Walmart Marketplace | 2,000 px (long side) | White or off-white | sRGB | 5 MB |
| Etsy | 2,000 px minimum | Any (white preferred) | sRGB | 1 MB |
| Shopify/D2C | — | Brand choice | sRGB | 20 MB |
File format guidance:
- JPEG for all marketplace and web deliverables; PNG when transparency is needed for overlays
- Always embed the sRGB color profile; never deliver untagged files
- Name files with SKU, shade, and angle:
SKU001_CreamBlush_Front.jpg
Alt text and SEO basics:
- Write descriptive alt text: "Matte rose lipstick in shade 04 on white background" beats "product image 1"
- Include the shade name, product type, and finish in the alt text
- Use the same naming convention across your catalog for consistency in search indexing
Platform readiness checklist:
- White-background hero at correct resolution
- Multi-angle set (minimum 3 images, ideally 5–7)
- Texture or macro detail image
- Lifestyle image where the platform allows secondary images
- Files named by SKU and angle
- sRGB profile embedded in every file
When should you DIY, and what does a pro shoot cost in the US?
The decision comes down to five factors: SKU count, required color fidelity, launch timeline, platform compliance complexity, and whether you need live models or styled props.
DIY makes sense when:
- You have fewer than 20 SKUs and a flexible timeline
- Your products have simple packaging (no heavy gloss, no glass)
- You can invest 2–3 days learning a basic tethered workflow
- Your primary platform is Etsy or a D2C site with flexible image specs
Hire a pro when:
- You are launching on Amazon or a major retailer with strict compliance requirements
- Your products include glass bottles, metallic packaging, or complex textures
- You need 50+ SKUs turned around in under two weeks
- Color accuracy is critical (foundations, lip shades, eyeshadow palettes)
Typical US pricing ranges:
- Per-SKU flat fees vary depending on service and complexity, typically in a modest price range.
- Half-day studio rates, including setup and basic editing, generally fall within reasonable professional service costs.
- Full-day rates that include styling and lifestyle shots tend to be higher but vary by provider.
- Retouching-only fees per image depend on complexity and service level.
- Rush fees are often charged as a percentage above standard rates but vary by studio.
What to include in your brief:
- Number of final retouched files per SKU and which angles
- Color-proofing method (ColorChecker workflow, ICC profile delivery)
- Turnaround time and rush availability
- File formats and sizes for each platform you sell on
- Usage rights: who owns the images and for how long
Red flags in a quote:
- No mention of a color-check or color-proofing workflow
- Retouching described as "basic cleanup" with no specifics
- No marketplace-formatted export included
- Turnaround time listed as "2–4 weeks" for a standard SKU count
Reusable shot list you can take to any shoot
A shot list is the single most effective tool for keeping a shoot on schedule and ensuring you never leave without a critical angle. Share it with any photographer you hire as part of your brief.
Standard shot list per SKU
| Shot | Description | Priority |
|---|---|---|
| Hero white-background | Front-facing, full product, pure white BG | Required |
| Front label close-up | Label readable, shade/name visible | Required |
| Angled 3/4 view | Shows product height and depth | Required |
| Back label / ingredients | Full ingredient list or key claims | High |
| Cap / closure detail | Finish quality, texture of cap | High |
| Texture / macro | Cream, powder, or liquid close-up | High |
| Swatch on skin | Shade applied to wrist or back of hand | Medium |
| Lifestyle / in-use | Product in context, styled | Medium |
Variations by product type
- Lipstick: add a bullet-tip macro and a swatch on lips (or wrist)
- Eyeshadow palette: add a full-open-palette flat lay and individual pan macros
- Serum/dropper bottle: add a dropper-tip macro with a single drop forming
- Jar cream: add a lid-off shot showing the cream surface and a scoop macro
- Fragrance bottle: add a backlit beauty shot showing liquid color and a cap-detail close-up
Pre-shoot packaging checklist
- All SKUs present and labeled with shade/variant name
- Stickers and adhesive residue removed
- Products cleaned and stored in a dust-free container
- Shade reference swatches prepared and labeled
- Props sourced and approved against brand style guide
- Cleaning kit on set: microfiber cloths, air blower, gloves, isopropyl alcohol
Common mistakes that cost brands money and how to fix them
Color drift across a session. Happens when you shoot JPEG or skip the gray card between lighting setups. Fix: shoot RAW and place a ColorChecker in the first frame of every setup change.
Fingerprints on glossy surfaces. The most common and most avoidable mistake. Wearing gloves and cleaning meticulously before every shot is faster than cloning fingerprints out of 40 images in post.
Inconsistent swatches. Using different applicators or surfaces across a shade range makes the catalog look unplanned. Fix: one applicator, one surface, one lighting setup for all swatches in a collection.
Over-retouching. Smoothing a cream until it looks like plastic or removing every specular highlight from a lip gloss destroys the product's appeal. Set a rule: no more than three healing passes per image, and always compare against the original.
Wrong export profile. Delivering Adobe RGB files to a marketplace that expects sRGB shifts colors in ways that look fine on your calibrated monitor and terrible on a customer's phone. Always embed sRGB for web and marketplace deliverables.
Pro Tip: For macro shots of small cosmetics, focus stacking is not optional. Capture 5–10 frames focused at different depths across the product, then merge them in Helicon Focus or Photoshop. A single-frame macro of a lipstick bullet will always have soft edges. A stacked image is sharp from tip to base.
Keep one archival master file (TIFF or PSD, full resolution, unflattened) for every SKU. Export from the master; never re-export from a compressed JPEG.
Legal and branding considerations you cannot skip
Copyright in product photography belongs to the photographer by default under US law, unless a written work-for-hire agreement transfers it to the brand. Get this in writing before the shoot, not after. The contract should specify who owns the images, the scope of permitted use (e-commerce, print, paid advertising, social media), and the duration.
Model and property releases are required any time a recognizable person or private property appears in an image used for commercial purposes. A hand model applying a cream, a face showing a foundation shade, or a distinctive interior used as a lifestyle backdrop all require signed releases. Without them, you cannot legally use the image in advertising. Standard release forms are available from the American Society of Media Photographers (ASMP).
Brand style guides protect consistency across a catalog and across photographers. A style guide for product photography should specify background color values (exact RGB), acceptable prop categories, approved surface textures, camera angle ranges, and color profile requirements. When you brief a new photographer or switch studios, the style guide is what keeps your catalog looking like one brand instead of a collection of unrelated shoots.
Trademark considerations apply to props and backgrounds. Using a competitor's packaging as a prop, or shooting in a location with visible branded signage, creates legal exposure. Keep props generic or brand-owned.
For fragrance product photography and skincare product images used in advertising, the FTC requires that claims visible in the image (such as "dermatologist tested" or "clinically proven") are substantiated. An image that implies a claim the brand cannot support is an advertising claim, not just a photo.
Key Takeaways
High-converting cosmetic product photography requires color accuracy, the right shot types, and platform-compliant exports, not just a good camera.
| Point | Details |
|---|---|
| Shoot RAW with a color target | Place a ColorChecker in the first frame of every setup to anchor batch correction and prevent color drift. |
| Plan 5–7 images per SKU | Hero, multi-angle, texture macro, swatch, and lifestyle images cover most marketplace and PDP needs. |
| Match light to finish | Soft light for matte, controlled specular for gloss, backlit setups for glass and translucent serums. |
| Embed sRGB in every export | Untagged or Adobe RGB files shift colors on marketplace platforms and customer screens. |
| Kenitpatel for catalog-scale shoots | Kenitpatel delivers marketplace-ready exports with color-proofing and a 2–3 day turnaround for e-commerce brands. |
The part most guides get wrong about beauty photography
The conventional wisdom says "invest in better lighting." That is not wrong, but it is incomplete in a way that costs brands real money. The actual bottleneck for most small beauty brands is not the quality of the light. It is the consistency of the workflow between shoots.
A brand that shoots one collection in January and the next in April will have color drift, inconsistent backgrounds, and mismatched prop styling unless someone documented the exact setup from the first shoot. The ColorChecker frame, the lighting diagram, the gray card reading, the export preset name. All of it. Most brands skip this documentation because it feels like overhead. Then they spend three days in post trying to match two batches that were shot under nominally identical conditions.
The other thing guides underestimate is how much the prep work before the shoot determines the post-production time after it. A product that arrives on set with sticker residue, fingerprints, and a dented label is not a lighting problem. It is a logistics problem that shows up as retouching hours. The brands that run the most efficient shoots treat product prep as seriously as lighting setup.
Small teams can absolutely produce professional-grade beauty product photos. Start with one product, one lighting setup, and a gray card. Document everything. Scale from there. The gear matters less than the discipline of the workflow.
What Kenitpatel delivers when you are ready to hire a studio
Shooting a full cosmetic catalog in-house takes time, gear, and a repeatable workflow that most small brands are still building. Kenitpatel offers a faster path: marketplace-ready cosmetic and beauty product photography with a 2–3 day turnaround, color-proofed exports, and platform-specific formatting built into every package.
A typical studio package from Kenitpatel includes white-background hero shots, multi-angle sets, texture macro images, retouching, and sRGB-embedded exports sized for Amazon, Flipkart, and D2C platforms. Color management is handled with a ColorChecker workflow, so the shades in your images match your physical products. For brands launching a new collection or scaling a catalog past 50 SKUs, the turnaround time alone pays for the shoot. You can request a quote or sample test shoot before committing to a full catalog run.
Useful sources for further reading
- ShotBG: Cosmetics & Beauty Product Photography Complete Guide — covers shot types, conversion data, and texture-forward trends in detail; a strong starting point for understanding what high-performing beauty images look like
- Visual Education: Tips for Cosmetics and Makeup Photography — practical studio advice on cleaning protocols, focus stacking, and post-production steps from working photographers
- Photoroom: Beauty Product Photography Tips — covers color accuracy, AI background removal, and web-ready export workflows for small teams
- Retouching Labs: How to Make Photos for Cosmetics and Beauty Products — technical guide covering color fidelity, physical swatch verification, and ICC profile management
- Amazon Seller Central: Image Standards — primary source for current Amazon image requirements including background specs, minimum resolution, and file format rules
- X-Rite ColorChecker Passport Photo 2 — tool page for the color target referenced throughout this guide; includes download links for camera profiles and Lightroom integration
- Helicon Focus — focus stacking software used for macro cosmetic shots; free trial available with full-resolution output in the paid version